Sep 30, 2010

Fresh New Landscaping: Front Yard


Our front yard had a little bit of landscaping, but it was insufficient. There was also no mulch, only grass and weeds going wild. A few azalea bushes and some overgrown perennial flowers (astilbe) that look lovely in the spring and summer, but completely DEAD in the winter. We wanted to add a few things that would look nice all year round (and more importantly, something to hang my Christmas lights on!), so we picked up some evergreens at discounted fall prices: 2 boxwoods, 2 holly bushes, and 2 thujas for future height and visual interest (they will grow up to 8 ft but our first floor is so high up that it won't be a problem).


We left the azeala bushes alone, but dug up the astilbe for transplanting - each one was so huge we broke it up into 4 pieces with a shovel (that's 16 pieces we had to replant!). We put all the new shrubs in line with the azaleas, which were actually far enough away from the house to allow for a second row of plants behind. So for added interest while the shrubs are small, we replanted half the astilbe flowers between each bush in the second row.

I also couldn't resist buying two small bright yellow mums for the corner by the porch stairs - they are so cheerful!


After everything was planted we pulled up all the grass surrounding the area (ugh!), laid down some newspaper as a weed blocker and covered everything with cedar mulch. The difference is amazing - it actually looks like real landscaping now! And we love the fact that the evergreen bushes will be beautiful all winter long.

Sep 29, 2010

Plastered in the Kitchen

Plaster is frustrating. It always looks worse before it looks better.

There's that horrible plaster dust everywhere, even with plastic sheeting over the doorways. The shop vac can't seem to keep up with it. We are tracking it through the house, it's permeating the air and settling on everything.


Sep 28, 2010

1-2-3 Coats of Poly


I know, it looks the same as before.  Three coats of polyurethane with nothing to show for it except significantly better protection for the future.  We used wipe-on poly, which dries to a really nice hard finish.   We've used all sorts of different types while refinishing furniture - oil based in a can, acrylic based - and this is our hands down favorite.  I'll never go back to another type. Because you wipe it on with a rag, there are no streaks or brush marks.  It's the most durable poly we've used.  I love it.

A little also goes a long way.  Three full coats in this kitchen and we only used half this small container.

Now we have to let the polyurethane "cure" for a week and harden.  We've learned some helpful tips and tricks from other DIY folks and our own experience.  While the directions say you can do your next coat in 2-3 hours, it's better to wait at least 12 hours to fully dry.   And it says you can start using your cabinets or furniture again in 12-24 hours, but you really want to let the poly cure for a week.  I know that's a huge pain when doing something like a kitchen - but there's a very good chance it's still soft and will chip if you don't wait.

Oh and only use this stuff in a well ventilated room with the windows open, and definitely do as much of it outside as possible.  This stuff has nasty toxic fumes.

Sep 27, 2010

The Finished Backsplash


We had a really hard time finding a bullnose (rounded top edging) tiles that matched our subway tiles.  I'm sure they exist, but we went for cheap a Home Depot version and none of the stores around here had it.  So we had to devise another solution to finish the edges in our bathroom and kitchen - molding.

In the kitchen we went with a very narrow piece of molding, painted white dove to match the cabinets.  It finishes off the edges of the backsplash for a cleaner look.


Once the trim was installed, we caulked the edges of the trim and around the tiles to finally finish the backsplash.   Caulking between the counter and the tiles was the hardest part because I kept smearing it all over the counter.  It comes off easily with wet soapy paper towels, but I must have gone through more than a dozen.

Mike also put the electrical outlets back together.  They look much better with their cover plates on them - and it's so nice to have electricity over here again! 

Sep 24, 2010

Doors!


We finally installed the doors on the cabinets! The Kitchen is finally starting to come together.

Mike cleaned all the original hinges (they were nasty and covered in rust) with a CLR bath and now they look like new.  It was a huge time savings for us not to have to buy new hinges, measure everything properly and drill all new holes.

Next we're going to polyurethane everything - all the doors, shelves, drawers, interiors and exteriors. We are doing it with the doors on because we wanted to give ourselves a chance to paint over any installation dings (and there were quite a few!) beforehand. The polyurethane is clear so it doesn't matter if it touches the hinges - if anything it will help prevent future rusting.

Sep 23, 2010

Kitchen Knobs on a Budget


These are the knobs that are going on the kitchen cabinets and drawers.  I know that I already shared the drawer pulls from my trip to Restore back in July, but never got around to sharing the coordinating knobs from Target.  Surprisingly they match perfectly.  I actually originally wanted a different set of knobs, ones that I had used when we refinished Mike's dresser a year ago, but Target no longer carried them.   However they had these knobs instead and I'm really happy for the change - not only are these a much better weight and thicker shape than the old ones (for the same price!), but I think this new design actually coordinates better with the drawer pulls.  Target's latest assortment seems to be channeling higher-end stores like Restoration Hardware for their knock-offs - and I for one am very pleased about it.

Sep 22, 2010

I love White Paint


The cabinets are finally painted! 1 coat primer + 2 coats of White Dove in semi gloss by Benjamin Moore. It took 1.5 gallons - I wanted to try to only use only one gallon and skip a second coat inside the cabinets - but it looked terrible with only a single coat.

The kitchen is now so much lighter and brighter! I can't wait to get the cabinet doors rehung.

Sep 21, 2010

Grouted


Here's the backsplash grouted. We're really happy with it. It still needs to be caulked, but first we want to add a little trim around the edges (not shown here) to finish it off. We did that in the bathroom and it was the one of the best decisions we made.

I can honestly say grouting and tiling around the new tall faucet was a little bit of a challenge. In a perfect world we wouldn't have had to rush the countertops, sink, or stove. If there had been proper working shutoff valves, we could have done all the tiling work and cabinet painting before putting all that in.

Sep 20, 2010

Got Tile?


We tiled the backsplash with leftover subway tile from the bathroom. Next up, grouting.

Sep 17, 2010

Stove Reinstallation


We had no hot water for 3 days.   When we went to disassemble the kitchen countertops, we had to remove the stove and sink and we ran into some issues.  First while disconnecting the sink Mike discovered the hot water shutoff valve underneath was broken, so we had to turn off the hot water for the whole house from the basement.  In a desperate attempt to get the hot water turned back on before the work week, we put all our efforts towards getting the new sink basin and faucet installed so that when the hot water was turned back on there wouldn't be a huge flood in the kitchen.  By late Sunday night the sink was in and the faucet hooked up, the hot water valve turned back on, everything looked good... except the hot water was coming out cold.  Then we realized the hot water heater had no gas. Whoops.  When we disengaged the stove top, there was no shutoff valve for it so we had to shut off the gas for the whole house to prevent a gas leak in the kitchen.  No gas - no hot water, no dryer, no oven, no stove, no heat.  Did I mention how chilly the weather has been?

I needed my hot water back.  So of course installing the stove became our top priority the next night.  The second half of the countertop was installed with clear caulk and the mounting brackets, then we put the stove top into the pre-cut hole... and it wasn't fitting right.  It took us a lot longer than I care to admit, and involved cutting notches into the already-installed countertop with the jigsaw in the kitchen to no avail.  Eventually we figured out the problem - the gas hookup under the stove no longer lined up with notches cutout in the cabinet base and were stuck.  The reciprocating saw made quick work of creating wider notches - and finally everything fit.  We hooked the gas line back up to the stove and could (HOORAY!) turn the gas back on to the house.

Now I wasn't going to share this part because it's a little embarrassing, but we couldn't figure out how to get our hot water heater on again.  Now is our defense we've never had to do it before and the pilot light would not light.  We kept picturing gas explosions and singed eyebrows and the internet was not helping.  My poor mother had to come over and help us at 11 pm on a weeknight (we couldn't let it leak gas until morning) to fix it.  Mom, I swear we paid close attention and now know how to do it on our own for next time!

Sep 16, 2010

New Sink, New Faucet


Mike gets all the credit for the new sink installation. It looks awesome, it works great (no leaks!), and thanks to the internet he installed it with ZERO plumbing experience. Actually I take that back - his plumbing resume started with the removal and re-installation of our upstairs toilet when we had the bathtub reglazed - but this was much harder.

The enamel on our old cast iron sink was completely worn off and everything stained it. A glass of water would leave a ring. Since we had to remove the sink anyways to install the new countertops, we took the opportunity to upgrade to an inexpensive stainless steel sink that's a little bit wider and deeper. We also upgraded the too-low faucet to a lovely, tall, chrome Moen swan neck that will easily work with my large pots and pan.

First we installed the sink side piece of butcher block with caulk and the brackets it came with. Mike did a dry fit test with the sink to make sure everything was going to line up properly, then went ahead and assembled the faucet on the back of the sink while it was free from the counter (a helpful tip from This Old House - why torture yourself under the sink if you don't have to?). I caulked around the edge - my one contribution - then the sink basin was placed in the pre-cut hole and secured to the countertop with brackets.

Mike attached the faucet to the pipes inside the cabinet, then moved on to drain assembly. During the sink removal process, he cut the old copper pipe that was welded to the u-trap and took a trip to Home Depot to get a new PVC drain kit and stainless drain basket. With his laptop set to the helpful instructional guides, Mike assembled the drain (with plumber's putty, a large plumber's wrench, two adjustable wrenches and an entire wrench kit in various sizes). It took some trial and error to get everything to fit properly and fix a couple leaks, but I was impressed. It also helped that we took the time to measure carefully and make sure that the drain was in the same spot as the old sink. This way when Mike rebuilt the drain he was able to use the old one as a guide instead of figuring out a new configuration from scratch.


Having a new functioning sink in the kitchen is a huge win for us. It looks so much better and we couldn't be prouder that we did this by ourselves. We've learned so much over the past few months, but this was definitely the biggest challenge to date.

Sep 15, 2010

New Countertops


Our new butcher block countertops are from Ikea.  We picked them up over Labor Day weekend and getting them home was a challenge.  Not only did they weigh a thousand pounds, but the 97 inch length plus box and padding almost didn't fit in my small SUV.  In fact the two boxes were wedged between the windshield and the trunk door, with all the seats down, and me squished into the back seat (don't worry I managed a seat belt). I t was interesting to say the least.

Before cutting the pieces down to fit our cabinets, we measured once - twice - three times to be safe. And we discovered a new FUN FACT about our house - the lower kitchen cabinets were built at an angle.  As in the side with the sink is 25" deep and the side in the other corner is 23.25" deep and the whole front is slanted.  This was much more obvious with the countertops off - but boy for something that's held up for 50 years, it was sure built wonky. Luckily straight countertops hide wonky cabinets underneath.

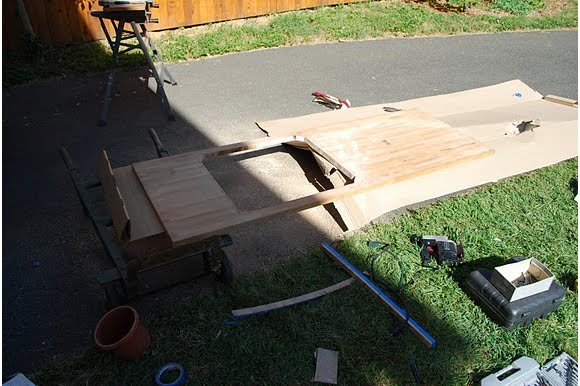
Once the 2 countertop pieces were cut down to size with the circular saw, we measured the first piece to fit our new sink.  We drew the lines according to the diagram in the sink directions and then cut it out with a jigsaw.  This was a lot more work that in sounds like because butcher block is very dense (which is why it weighs so much).  It took a lot of muscle to push things along and it took a while to cut through it.  The blade on the jigsaw (and the drill bit to make the pilot holes) get so hot working through the wood that it actually burned the wood and smoked the whole way around.


After we cut the sink hole, we were disappointed to find out that the diagram we followed was a complete FAILURE.  As in completely inaccurate and imaginary.  Totally impossible to make the shape they illustrated and fit the sink basin.  Luckily the hole was too small instead of too big - we only had to cut the whole thing again instead of buying a new piece.  But I am thinking about writing the sink manufacturer an angry email over the gross inaccuracy.


As seasoned jigsaw pros at that point, cutting the stove hole was much easier and went much faster.  We were no longer afraid that the hot burning jigsaw blade was going to set the whole wooden countertop on fire so we forged confidently ahead.  Once we double-checked that both holes fit the sink and stove top, we moved on to countertop installation.

Sep 14, 2010

A Fresh Start in the Kitchen


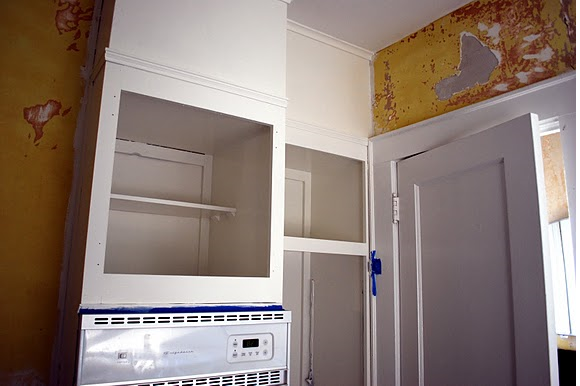
Before we could put the kitchen back together again, we had to lay a new "foundation" for a fresh start.  We put up green board under the windows and cabinets to provide an even, water-resistant surface for our tile backsplash to stick to.  There was a major uninsulated gap under the window in the wall that we filled with some spray foam insulation before screwing the board in - a detail that will be much appreciated this winter.

Once all the green board was up and screwed into studs, we covered all the edges and seams with seam tape, then mudded everything with plaster-friendly joint compound.  Then came the cabinet priming.  I covered the whole thing - all the inner nooks and crannies, including the parts that will never show, with the primer.  It might be mild OCD but I wanted to seal in anything and everything from the old cabinets and start fresh.  I feel better knowing everything inside was primed and any weird stains covered.  The only unprimed spot that remained was directly under the sink - this waited until after the new sink was installed, the faucets hooked up, the drain built and tested for leaks.  No sense in doing it twice... plus the bucket was in the way.

Sep 13, 2010

Kitchen Deconstruction

We had a big weekend.  A really big weekend.  A weekend so big I woke up this morning with a headache and feeling like I'd been hit by a truck.  I wish I could say it was because we just celebrated too hard after watching the Giant's first victory of the season.  Except it was because we did major work on the kitchen.  And it was brutal.


Just removing the countertops was an adventure.  First we had to learn how to disengage our stove, which required finding the manual in the basement (and our basement looks like an episode of Hoarders, it's so embarrassing).  Eventually we got the stove top off the counter (we shut off the gas - don't worry), but then the sink was even worse.  The trap was welded to the drain and required a hacksaw.  The other pipes, even with a monster pipe wrench, had 50 years of corrosion to twist through.  The hot water shutoff valve to the faucet was completely broken so we had to shut off the hot water to the house and keep a bucket there while working.  Then there were the clips and screws connecting the basin to the countertop, the screws so completely rusted that they required a wrench and brute force.  If the countertop wasn't a giant L and the sink wasn't cast iron, we would have taken them off together (we tried- impossible).  Seriously there were a couple scary moments in there where I thought serious injury might occur.  I promised Mike I would visit him in the hospital.


Yet somehow it all came out.  The sink, the faucet, the old (NASTY!) drain - gone.  The countertop (with some serious maneuvering) made it off the cabinets and outside without breaking anything.  The stove is awaiting re-installation.  The ugly old vent was removed so we could clean it up and remove the final piece of back splash it was sitting on.  We chipped away at some additional plaster to make room for the new green board coming in for behind the backsplash.  I could finally reach the deepest parts of the base cabinets for priming.  Our kitchen finally became a blank canvas.

Coming Soon

Photo from allmodern

Some exciting news for us, the folks over at CSN want to help us out with our ongoing house project!  CSN is a huge group of online stores, you've probably shopped one of their sites before without even realizing it.  They do everything from coffee tables to decor to cookware.  I'm most familiar with (and a past customer of)  allmodern.com because they carry some of my favorite brands including dwell studio (and Ferm living, Amenity Home, Inhabit, etc.).  I'll be sharing a product review of something for our little yellow house sometime soon.

The hardest part for me is what to pick - there are so many things we need... and so many things I want!  Anyone have any suggestions?!
 

Sep 10, 2010

Backsplash Be Gone

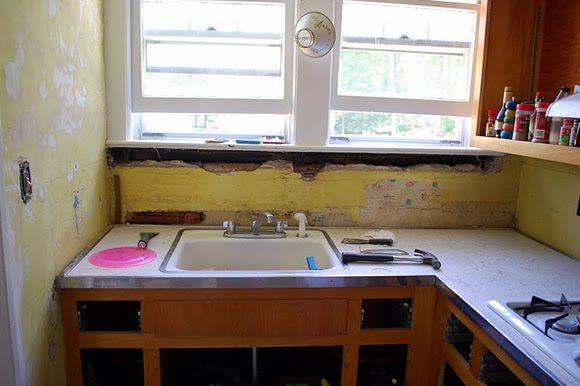
Mike removed the old ugly backsplash behind the sink in the kitchen, only to find disgusting crumbling plaster behind. And some totally disgusting (grease splattered) 1950s wallpaper. Since we know this kitchen was installed in 1960, it was like opening up a time capsule.

The plaster under the windows was crumbling off in chunks...

Removing the back splash was bad enough (back in June, the other half of it required 3 people to pull when the electricians were here) but then because the plaster was so bad, Mike had to chisel all of that away too down to the wooden lath. We'll be replacing it with green board and adding some spray foam insulation under the windows once the counter tops are off.

Hello Greasy 1950s Wallpaper...

Sep 9, 2010

Laboring Over the Long Weekend

Over the weekend we painted the cabinet doors, drawers, and shelves in the yard outside.  It took full 3 days to get it all done - it sounds like a long time to get a few things painted, but for such a small kitchen we have a lot of cabinets!  There's a total of 35 pieces with 2 sides each (front and back, top and bottom) for a total of 70 surfaces.  1 coat of primer + 2 coats of paint x 70 surfaces = 210 things to paint.  And that's not including the 3 coats of polyurethane I still need to apply or the actual cabinets.  This kitchen project is a monster and we've barely begun.

The cabinet doors ready for painting

Before painting, I filled all the old cabinet hardware holes with wood putty, let it dry and sanded it smooth.  Everything had already been sanded back in June.  I primed and painted everything outside, leaning the doors against the house (it's so much easier to paint upright than laying it flat) and placing everything on cardboard to protect it from the grass.  I used a paintbrush for the tight spots and a 4" foam roller for everything else.  I like the clean flat surface that foam rollers leave behind, I've used them for all my furniture painting projects and have been really happy with the results.

The cabinet doors, primed

I used Killz high-adhesion primer in white to seal everything in and help the paint adhere better.  Some spots required a quick second coat.  The cabinets are Benjamin Moore semi gloss in white dove, my favorite shade of bright creamy white.

The cabinet doors, all 27 of them, painted

Sep 8, 2010

Our Next Project: The Kitchen


Originally I thought we'd be done with the kitchen by August.  This was of course before reality set in and I realized that having a place to shower and a place to sleep would take much longer than I imagined.  My goal for the summer was a finished bathroom, a place to cook and a bedroom that fit our furniture.  I wanted to unpack all of our kitchen stuff as soon as possible after moving in.  Hah!  How naive I was all those weeks ago!  We were able to do some deconstruction (we removed the wallpaper, the cabinet doors & shelves and sanded the cabinets) the first weeks of home ownership and then... well nothing.  We just lived in the chaos with 90% of our kitchen still packed.

Over the weekend we finally restarted the kitchen project.  This is our biggest, scariest project to date.

The stove and oven are only a few years old, so they are staying.  Everything else needs some serious revitalization or replacement in order to make this kitchen livable.  We're keeping but painting the cabinets for now - they are 50 years old, stained and quite worn but real wood.   The kitchen sink has lost all its enamel and is very stained.  The sink faucet is so low I can't wash big pots.  The laminate counters are stained and cracked - anything spilled leaks into the cabinet below.  The cabinet hardware is rusted.

The pressure is on because we are also on the clock for this project - once we start we can't stop.  As anyone who has ever redone their kitchen already knows, the hardest part about this renovation is that we temporarily lose our kitchen, even if we're keeping the appliances and cabinets.  We have to disengage the stove and the sink - which means no cooking and doing all our dishes in the nasty utility sink in the basement until we're finished.


Here's a detailed plan of what we'll be doing in the kitchen over the next few weeks:
  • Paint the tired kitchen cabinets a bright creamy white, inside and out
  • Polyurethane the kitchen cabinets for extra protection
  • Replace the cabinet knobs and drawer pulls (fill in current holes and drill new ones)
  • Replace the worn-out counter tops with butcher block
  • Replace the backsplash with white subway tile leftover from the bathroom
  • Replace the crumbling plaster walls behind the current back splash with green board
  • Salvage and degrease the vent hood over the stove
  • Replace the stained white sink with a new stainless one
  • Replace the too-low kitchen faucet with a taller faucet so I can wash large pans 
  • Replace country-style sconce with a utilitarian spot light
  • Repair damaged plaster walls and ceiling
  • Paint kitchen walls
  • Scrape and repaint windows
  • Add new curtain hardware and window treatments

Sep 7, 2010

House Numbers


We finally had a chance over the long holiday weekend to install house numbers on our porch. Mike's mom and stepdad sent us a really nice plaque with our full street address as a house warming gift. (Note: actual address has been photoshopped for privacy reasons.) This was a much needed upgrade for our front porch - now people can actually find our house!

Sep 2, 2010

Mark Your Calendar: October 1st-3rd


For anyone who lives in Northern NJ who likes "junktiquing" - mark your calendars for The Far Hills Rummage Sale October 1st-3rd. It's at the Far Hills Fair Grounds (which is actually just a sports field) from 9:30-3:30 on Friday and Saturday, and the Sunday bag sale 12:30-3:30. It's one of my favorite places to go for great deals and every year I have found something totally worth the trip.

Now some of you might turn up your nose at the term "Rummage Sale" - but this one is the exception. First of all, it's huge with multiple tents for different things (furniture, housewares, clothes, kids toys, etc). Secondly, all the proceeds go to the Visiting Nurse Association so it's for a good cause. Most importantly - it's Far Hills with the giant estates, mammoth mansions and horse farms  - and rich people get rid of nice stuff.

Some of my favorite deals over the years include: 2 Pottery Barn throw pillows - covers and down-filled inserts for $5 a pair (the inserts alone new would have been $40), 4 panels of floral curtains for $16, a brand new Tommy Hilfiger skirt for $8 with the tags still on it, sets of ceramic flower pots for $2, and a mahogany side table for $8. I get giant stacks of books for $2 or less each. I've seen friends get sets duponi silk curtains, designer purses, adorable kids clothing, artwork, chairs, dressers, coffee tables... I could go on and on. It's totally worth checking out.

Anyone want to carpool?
 

Sep 1, 2010

Bathroom Decorating Details: New Knobs


Okay I confess. When I bought knobs for the media stand in the living room, I left out the part where I bought new glass knobs for the upstairs bathroom too. Then again, I also left out the part where I got totally overwhelmed by all the beautiful options and tried to buy all the knobs in the store.

I am really glad I got this particular style of glass knobs. They were not the ones I originally planned on getting, but these were less expensive and better suited in size for the vanity and medicine cabinet. They add a classic vintage touch to the newly remodeled bathroom and match the door knobs perfectly. I also really like that they coordinate with the shower curtain hooks as well. I love little details like this, they really help bring the room together.